An allsky camera is a great way to monitor your skies for interesting events. Ours has captured aurorae, notctilucent clouds, fireball meteors, many interesting cloud formations and a tornado (which also tore part of our roof off!).
Here’s how we built it.
Before you Begin
I originally built the allsky using an IMX291 mono IP security camera. This worked ok but was not really quite good enough. So i decided to swap to a PiHQ. This gave me one small problem.
My original camera was connected over ethernet. However, the Pi HQ camera connects to the Pi with a 20cm ribbon cable. This would normally mean you had to put the Pi in an outdoor housing next to the camera, which concerned me given the UK’s damp climate!
I therefore used the “Cable Extension kit for Pi Camera” which allows you to extend the distance from camera to pi by up to about 10 metres. Note that although it uses a standard network-type cable to connect camera and adapter it is not a network adapter for the camera.
However, you may prefer to buy a pre-made enclosure, and keep the Pi next to the camera. There’s more about this at the end of this blog.
Hardware Required
- Raspberry Pi 4 or 5 with at least 1GB memory, ideally 4GB.
- Power supply for the Pi.
- 128GB SD card
- Suitable enclosure and fan for the Pi – but see notes below as this is complicated.
- Raspberry PI HQ camera with adapter for M12 lens.
- 1.8mm fisheye M12 lens.
- Cable Extension Kit for Raspberry Pi Camera.
- 30cm length of 100mm drainpipe
- End-cap for the drainpipe
- 100mm clear perspex acrylic dome with a flange.
- 2x M2.5 bolts about 25mm long to attach the camera to the end cap.
- Three 8mm long self-tapping screws to attach the dome to the end-cap.
- Bathroom sealant, hot glue and duct tape.
- Various network cables and power cables.
Originally i also added an allsky camera dew heater, controller and power supply. However I found that the camera itself generates enough residual heat to keep the dome clear under normal UK conditions.
I bought the Pi, power supply, case, fan, camera and extension kit from Pi Hut but other vendors are available. Most other components were from eBay or Amazon, apart from the drainpipe which was from a skip!
Costs
In 2024, the parts cost me about £220 : £60 for the pi (4GB model) + fan, Pi HQ camera £48, 1.8mm lens + adapter £15, SD card £10, Pi power supply £10. The cable extension kit was £60. The dome was £10 from ebay. Other parts i scavenged or had in my garage.
The 3rd party waterproof housing costs about £30, which would have allowed me to save on the cable extension kit, however i would then have needed a PoE injector and splitter at a cost of £28 so it would have been much the same total cost.
Software Required
- Raspberry Pi Imager, to install the operating system on your Pi
- Allsky Camera software, from https://github.com/AllskyTeam/allsky
Assembling the Camera
- Fit the lens to the camera using the M12 adapter that came with the camera.
- Measure the lens’ external diameter, add a few millimetres and then drill a hole in centre of the the drainpipe end-cap to pass the lens through from below. You need to be able to rotate the lens to focus it, so make sure the hole is large enough.
- Present the camera to the inside of the end-cap, poke the lens through and mark the positions of two diagonally opposite corner holes of the camera mount
- Remove the camera and then drill holes through the end cap in these locations large enough for your M2.5 bolts.
- Bolt the camera firmly in place on the inside of the end cap.
- Aside: i actually drilled two holes at each corner and used cable ties as I didn’t have any bolts.
- If you’re using a dew heater ring, glue this onto the top of the end cap with hot glue, then drill a hole though the end cap and pass the dew heater’s power cable through it.
Later, we are going to attach the end-cap to the drainpipe but don’t do this yet.
Connecting the Camera
- Important: make sure you never accidentally connect the camera extender cable to the Pi’s “normal” ethernet port, or connect the hat to your router. This would damage the camera, hat, or pi or all three.
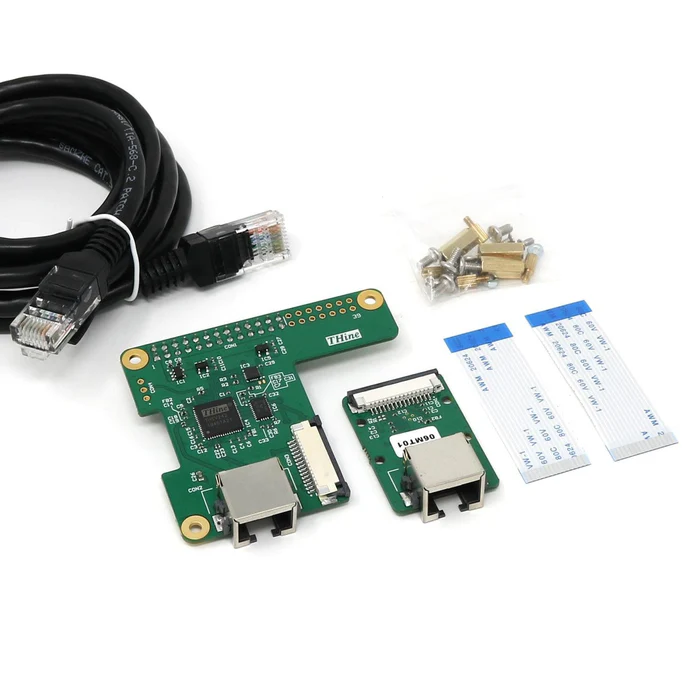
- Open the cable extension kit. You should have two short ribbon cables, one hat to put on the Pi and one connector for the camera end plus a short network cable (see image to the right).
- Using one ribbon cable, connect the camera adapter to the camera.
- Using the other ribbon cable, connect the Pi hat to the Pi and plug the hat onto the GPIO pins.
- Connect the adapter to the hat with the short network cable so we can do some testing later.
Initial Software Setup
- Using the Raspberry Pi Imager, install the latest version of the Raspberry Pi Operating System onto an SD card.
- During this process, select the option to Edit Settings. Give your Pi a unique hostname, set a username and password, and configure it to connect to your wifi.
- I also recommend you enable SSH on the Services tab and provide a public key, though its not essential. SSH allows you to login to the Pi for maintenance.
- While the SD card is being created, connect a monitor, keyboard and mouse to the Pi but do not power it on.
- Once the SD card image is finished, insert it into the Pi and switch on the power.
- The Pi will reboot a couple of times and eventually you will see the desktop.
Focusing the Camera
Before going any further its important to get the camera focused. I used the built-in libcamera software for this.
- During daytime, point the camera at a distant object, at least 100 metres and ideally further away. I used a tree on the hilltop behind our house.
- Login to the Pi and open a Terminal window.
- Take a picture with the camera by typing:
libcamera-jpeg -o ~/test.jpg- This will save an image
test.jpgin the user’s home directory on the Pi. You can view this using the Pi’s image viewer to check for focus. - Start with the lens screwed in as far as possible, and move it out about half a turn at a time then take a new picture and check it.
- Note that its not essential to have pinpoint focus because stars show up better if they’re a little out of focus and other objects like clouds etc will be moving and thus slightly blurred anyway.
There’s probably a better way of doing this. In principle VLC can stream video from the camera but in my case it didn’t work. If you figure it out, please let me know in the comments!
Cooling and Case
I found that the Pi ran very hot, partly because our observatory gets very warm during the day but also because it is very busy taking photos.
If you’re not using the Extender kit, you should be fine to put the Pi in a normal case with a good fan. However , the Cable Extender Hat covers the normal pins used for the fan, and also prevents the pi fitting in a hard case, so i had to be creative.
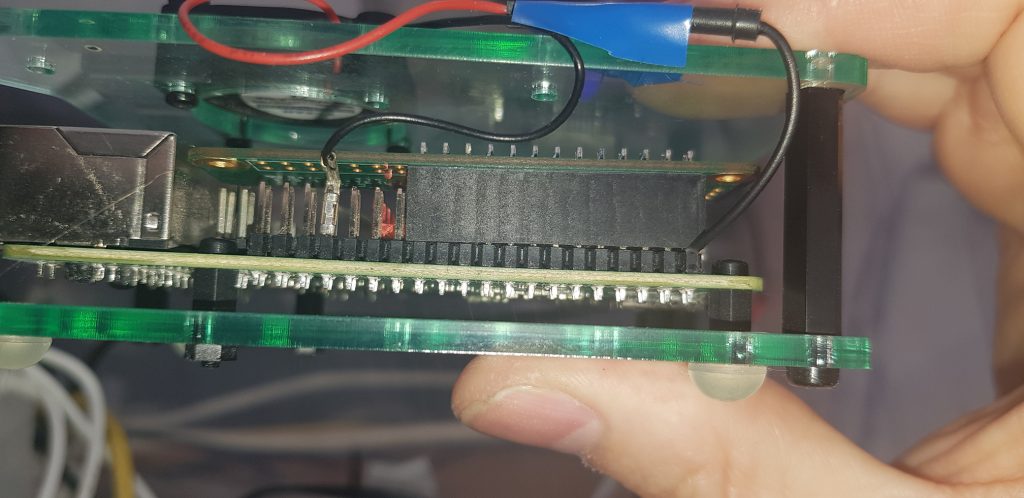
I solved this by stripping the insulation from a spare wire and inserting the bare end into the socket on the hat that corresponds to pin 2 (+5V), making sure there were no stray wires poking out. I connected the other end of this wire to the fan’s red cable.
I then attached the fan’s black ground wire to pin 30 (ground) on the GPIO connector. The hat gets in the way so I had to take the plastic sleeve off and bend the connector a bit to fit. This Heath-Robinson-esque assemblage is shown below.
Once the hat is installed, the Pi also can’t fit into most cases. I put mine into one of the perspex open-sided Layer cases from Pi Hut which are designed to cater for Pis with hats attached but other solutions are possible. You can see the case in the picture below.
Installing the Allsky software
Before proceeding, I highly recommend you read the instructions and watch the video here which explains in detail what you’re doing.
Once you’ve absorbed that, login to the Pi and open a Terminal window then type the commands below which will install and configure the software.
sudo apt-get update && sudo apt-get upgrade
git clone https://github.com/AllskyTeam/allsky.git
cd allsky
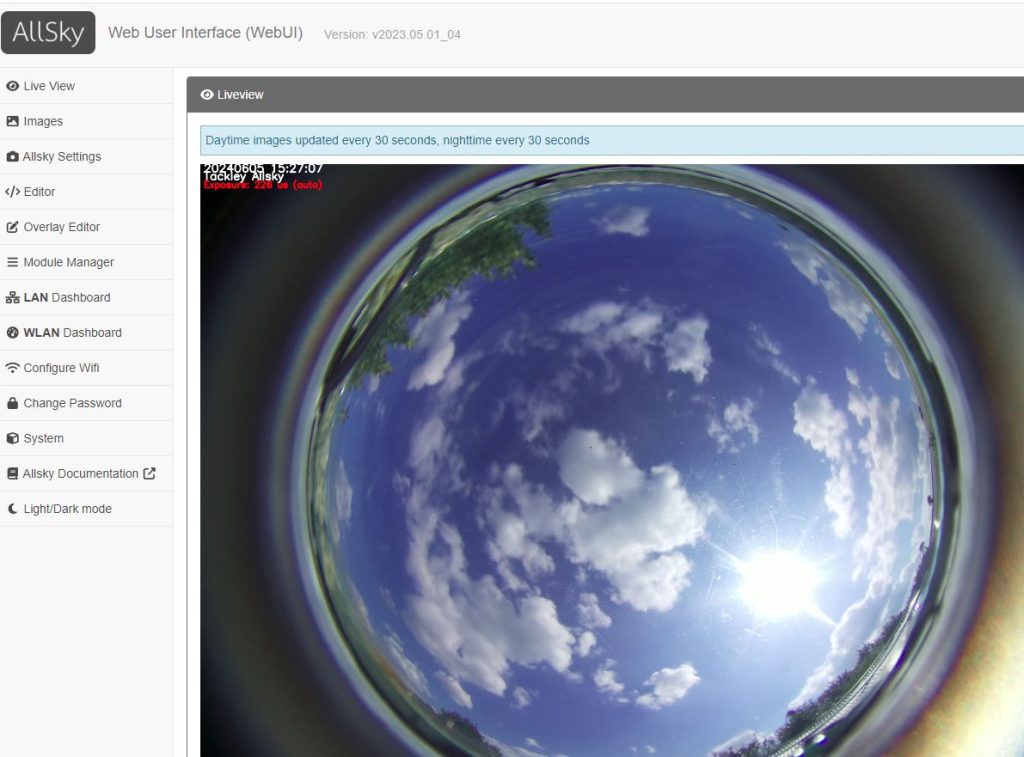
./install.shThis will eventually start a webserver on the Pi. As explained in the guidance and video, you can then login to the webserver to manage the software. There’s a screenshot of the Allsky web console later in this article.
Finishing the Camera Enclosure
Now you can complete the camera enclosure assembly.
- Place the perspex dome on top of the end cap and if its not predrilled, mark three locations on the flange for screw holes. Remove the dome again and drill holes through the flange.
- Present the dome to the end cap again and mark the positions of the holes on the end cap. Drill smaller guide holes into the end cap.
- Put bathroom sealant round the underside of the flange, and screw the dome onto the end cap with the short self-tapping screws.
- Present the end cap to one end of the drainpipe – making sure the camera adapter and dew heater cable are inside!
- Glue or duct-tape the end cap onto the drainpipe. I found that carpet repair tape worked well and lasted for years.
- Leave the assembly for at least a day to allow the sealant to set.
Installation and Final Testing
The camera can be up to about ten metres cable-length from the Pi, but I recommend keeping the distance shorter if you can. Don’t forget the cable run will be longer than the straight-line distance. My camera is about 6 metres from the Pi as the cable runs but about 2 metres away as the beetle flies.
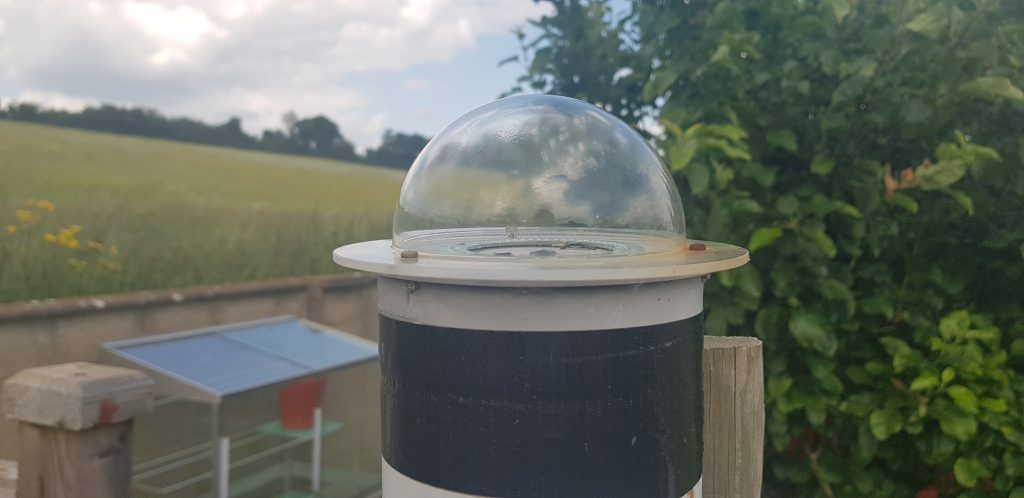
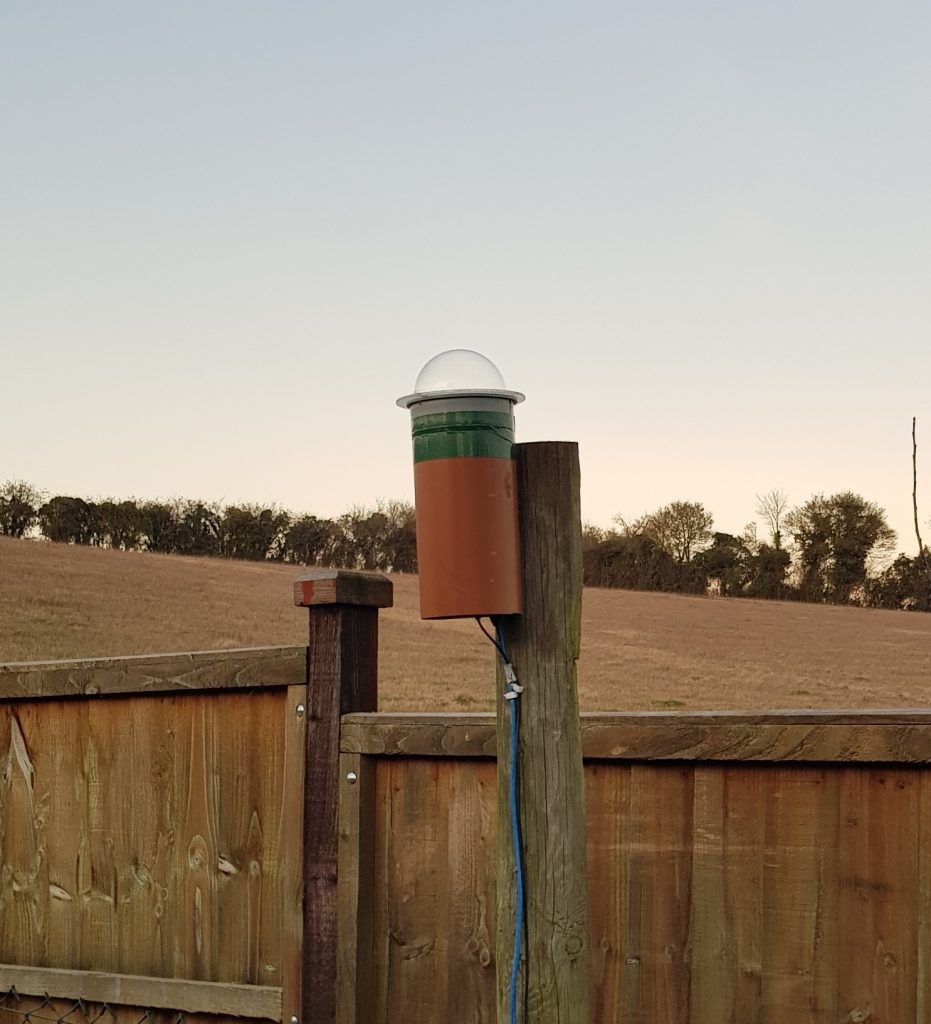
- Install the camera enclosure outdoors with the top surface horizontal. I cable-tied mine to a tall fence post as shown in the photo at the top of this pge.
- Don’t finalise its orientation though as we’ll want to rotate it so that North is “Up” on the images.
- Connect the camera to the Pi using a suitable long network cable. To prevent the network cable pulling on the camera module and potentially breaking the ribbon cable, i cable-tied it to the side of the pipe.
- Now you can run
libcamera-jpegagain to take a few stills to check focus and orient the housing with the camera sensor set in a North-South orientation. - If you need to adjust focus, remove the dome temporarily. You probably won’t need to replace the sealant as its quite compressible and will act like a rubber o-ring.
- Once the camera is oriented correctly, firmly attach the tube to the post. I drilled a couple of small holes through the pipe and screwed it on.

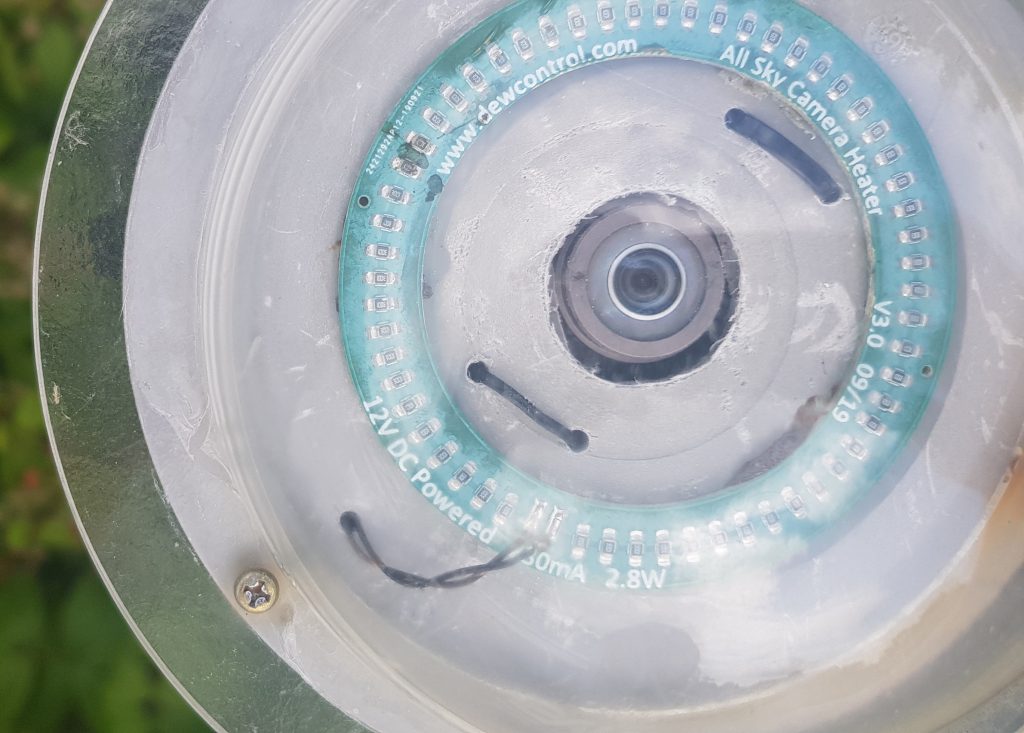
The picture to the left shows the underside of the end cap, with the bottom of the camera module visible in the centre. On the left you can see blue and yellow wires taking power to the dew heater. On the right you can see the adapter module hanging down from the camera, with its extension cable (blue, out of focus) at the top right.
Thats It!
The camera should now be working.
Using the web interface you can make various adjustments, though the defaults should work well. The default is to take an image every 60s, day and night, but vary the exposure time to compensate for light levels. I changed mine to take an image every 30s (see Settings section below), but you should experiment to seee what works best.
Each morning, the software will create a timelapse video, startrails image and keogram which you can view through the web interface. You can optionally upload these to an external website, but i leave this as an exercise for the reader.
Dew Heater Power
If you’ve installed a dew heater, you’ll need to run a separate power cable to it. I ran a bit of speaker cable out to the camera housing to provide this, with the other end plugged into a 12v source on the observatory power bank. The current requirement is tiny (0.3A or so) and the voltage loss in the cable will be unimportant.
Alternative Housings and Connections
As explained above, i didn’t want my Pi outdoors so i used the Lan Extender.
However, an alternative is to directly connect the camera to the Pi using its standard ribbon cable. This means that the Pi must be in the same outdoor enclosure as the camera.
If you choose this approach, i recommend you look at the Allsky enclosures made by dewheater.com. Be sure to mention you’re using an RPI HQ camera, and select option 3 but ask if they can supply the dew heater. You will also need a PoE injector and splitter to get power to the camera, unless you can run a long 5v cable to it. The total cost is about the same as my solution.
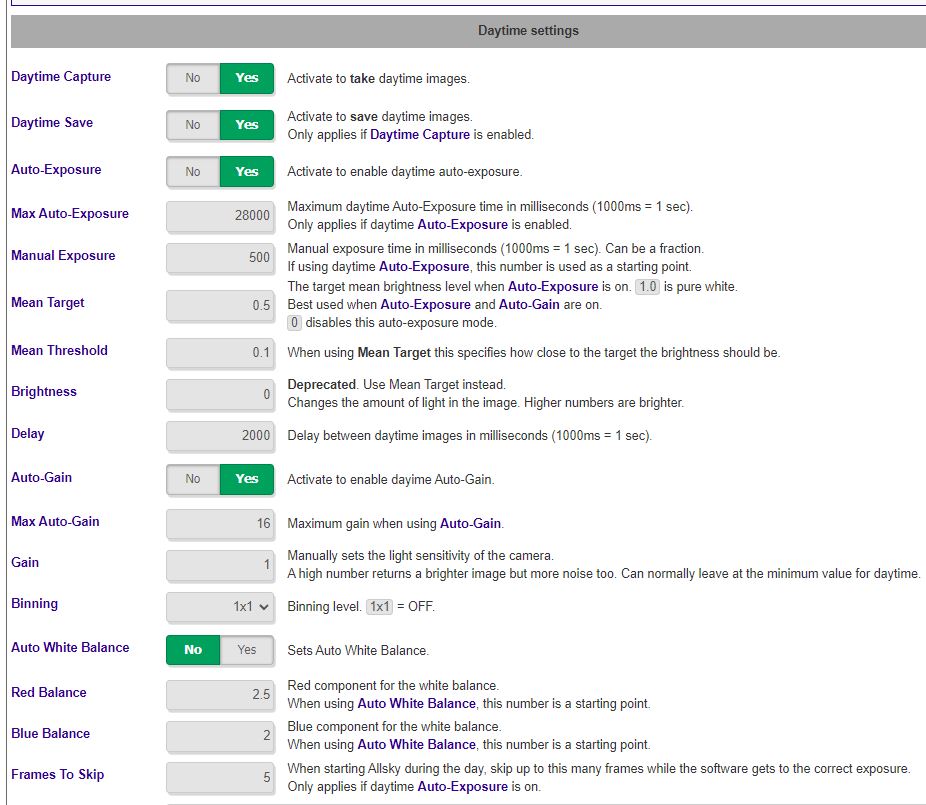
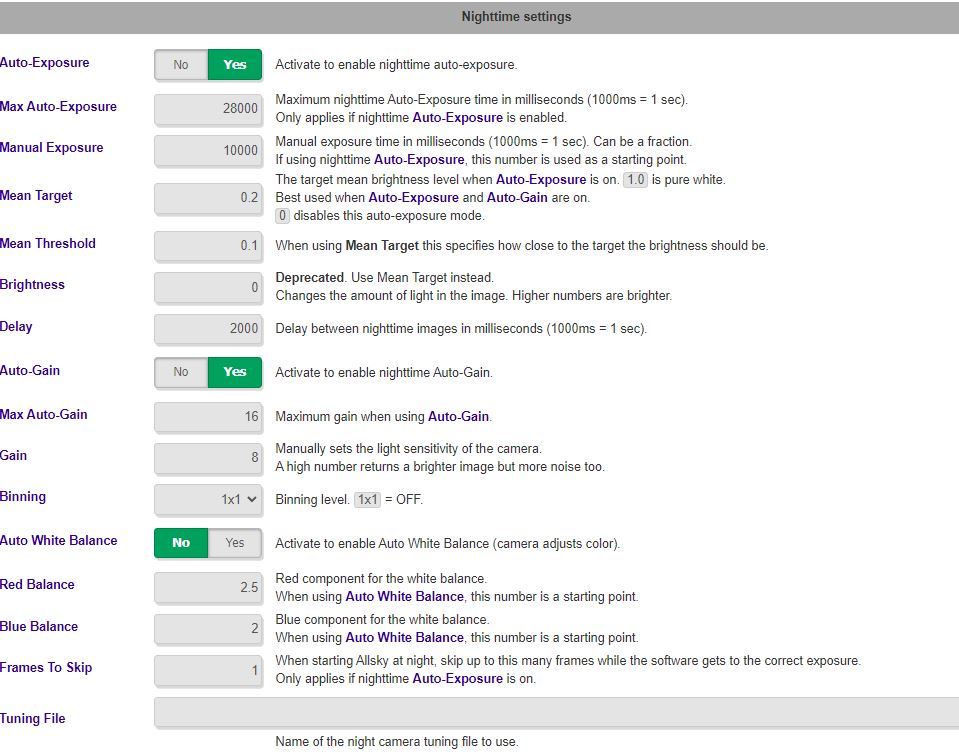
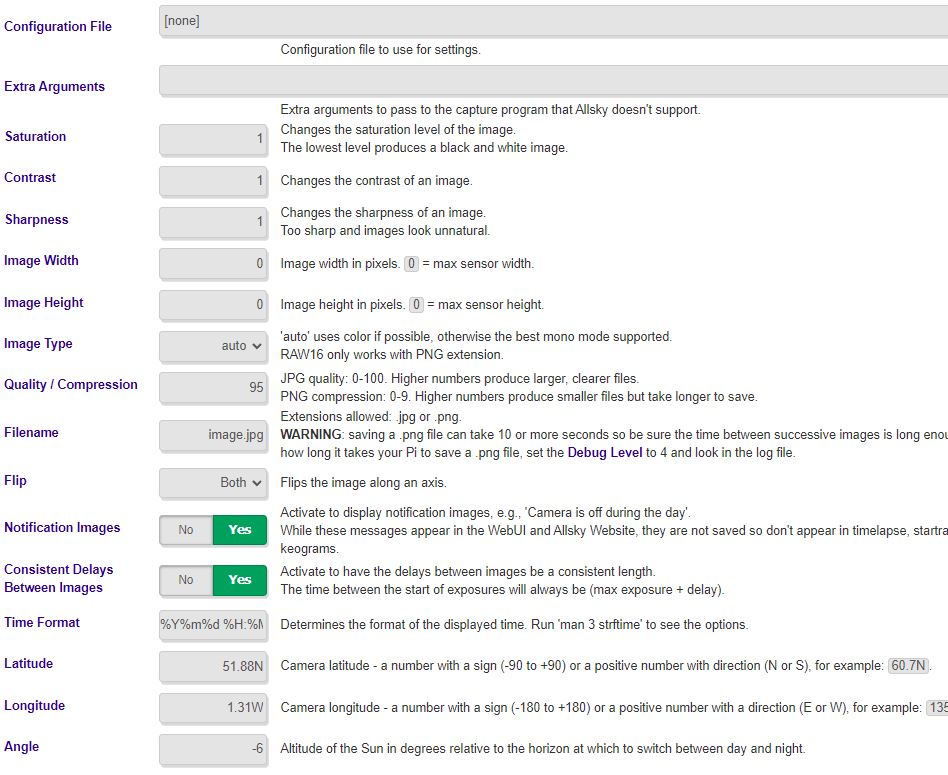
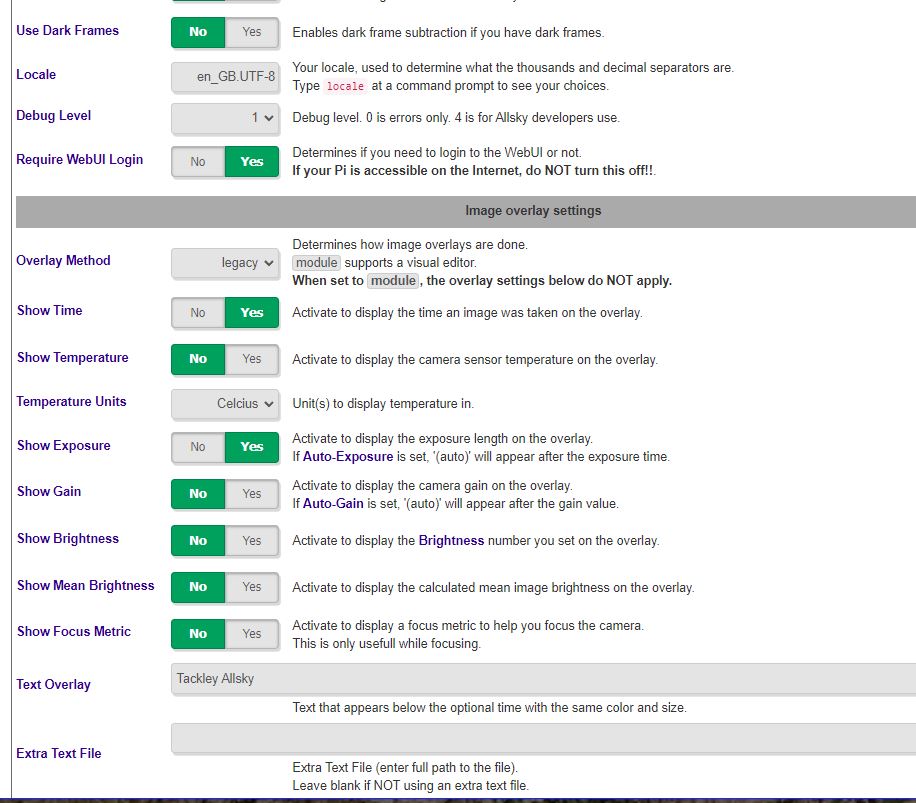
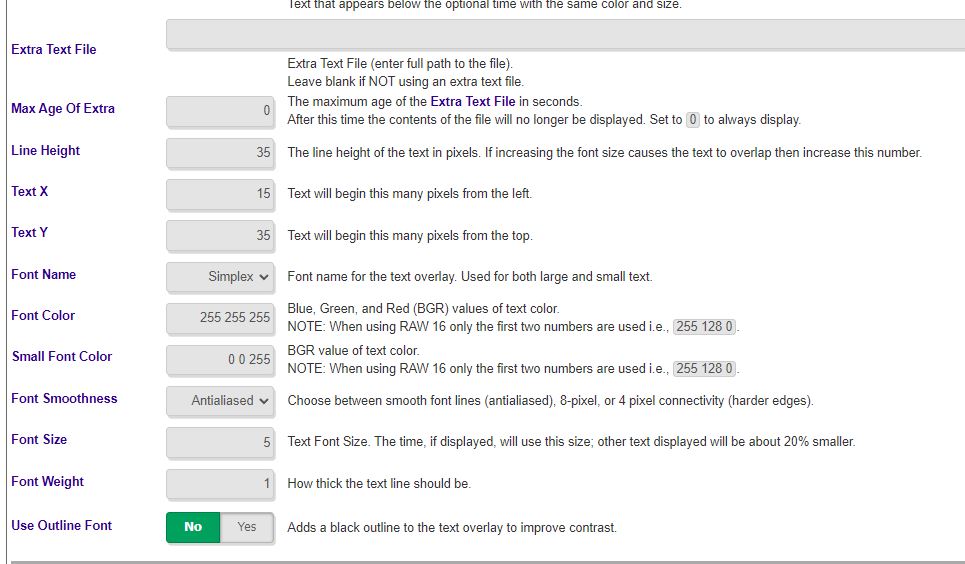
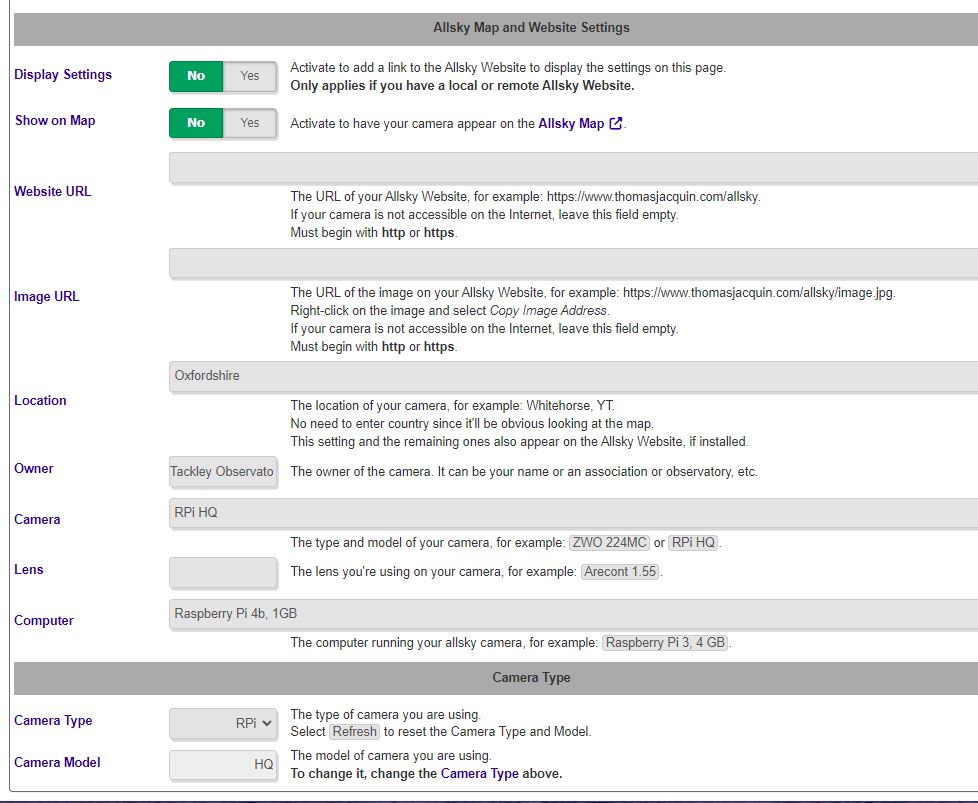
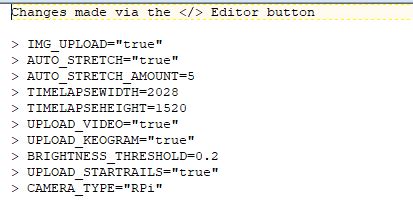
Settings
I did tweak the settings a little. Here’s a gallery of screenshots showing the settings i have used.