
Introduction
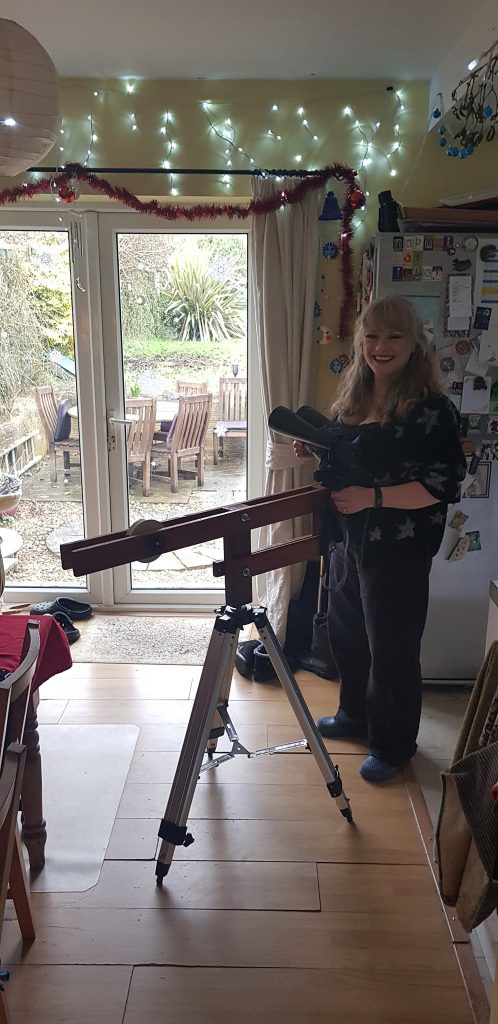
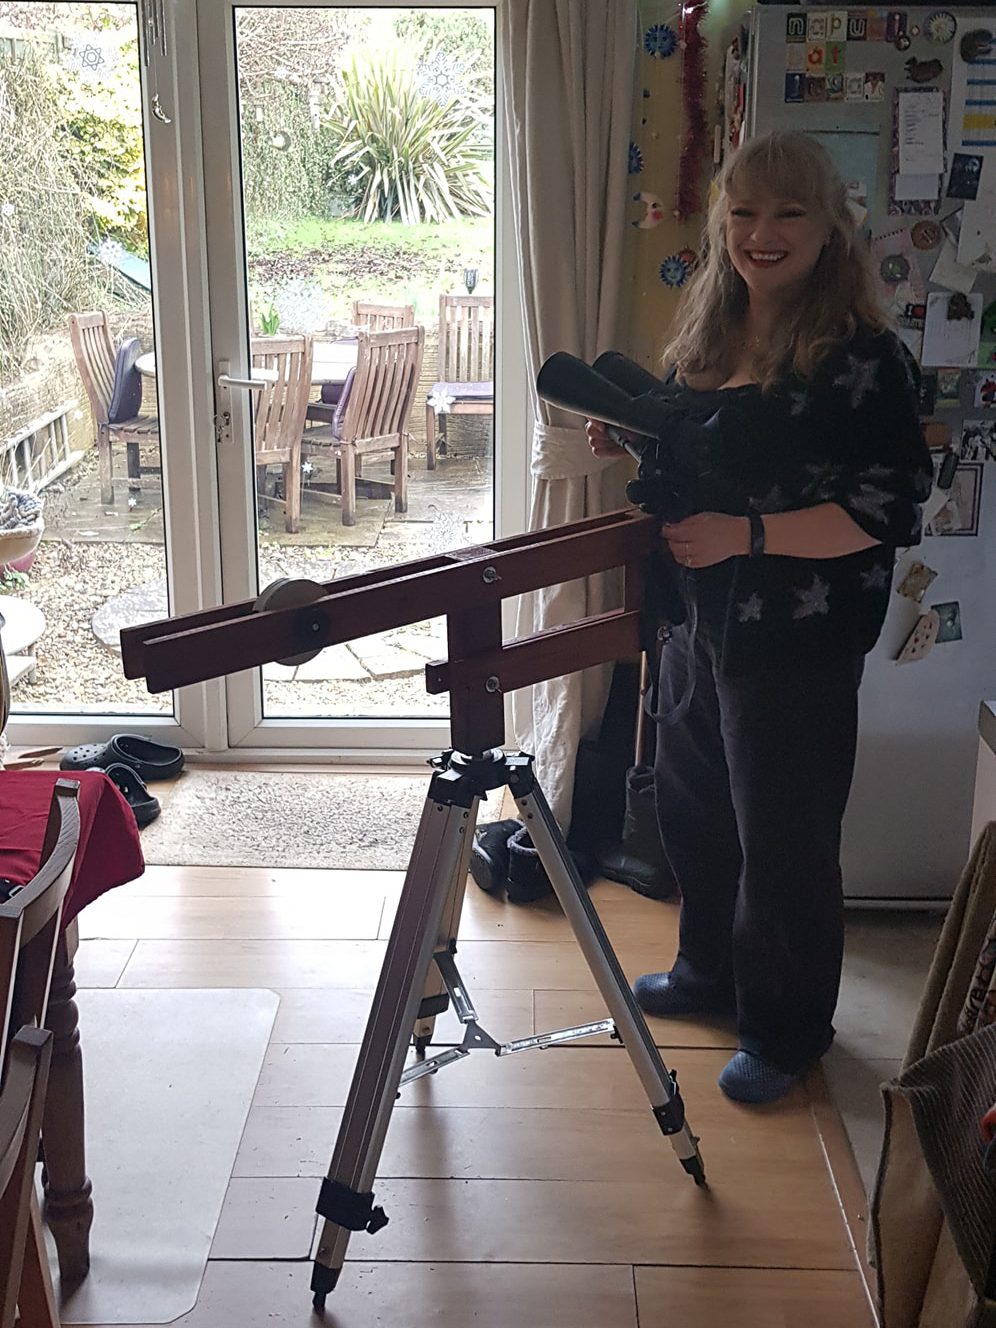
A parallelogram mount is extremely useful for holding large binoculars. I made one for Mary as she often sketches at the eyepiece, and holding binos while drawing is, well, impossible!
Note: I partly followed this design by Mark Radice, though as you can see its not identical.
Materials Required
For the Parallelogram
- Two lengths timber 900 x 65 x 15 mm for the top rails.
- Two lengths 410 x 65 x 15 mm bottom rails.
- One length 360 x 75 x 50 mm for the main post.
- One length 210 x 75 x 50 mm for the short post.
- A one metre length of 8mm threaded bar.
- Eight 8mm wing nuts with 16 washers and 8 split washers.
Other parts
- Camera Tripod ball head with camera shoe.
- Telescope or other very sturdy tripod. We used the tripod from our old EQ3 mount.
- Spare 1kg weight from a telescope counterweight set.
- One 3/8″ UNC or BSF bolt, to attach the tripod ballhead.
- One 10mm bolt, 25cm long, with a locking nut, for the pivot.
- One 8mm bolt, to hold the counterweight.
- Several washers and nuts in various sizes and diameters.
Tools and Equipment
- A power drill with 8mm and 10mm bits.
- A Hacksaw to cut the threaded bar to length and a file to smooth rough edges.
- Epoxy resin glue.
- Sandpaper and varnish to finish with.
The exact dimensions of the timber are not critical though i’d recommend nothing shorter than the above, as the binos will be too close to the tripod. I used softwood reclaimed from a pallet for the top and bottom rails and some 3″x2″ i had lying around for the other parts. You can also use hardwood which would be stronger and might look better.
Camera tripod ball-heads can be bought online for about £15 (in 2022). They normally have a 3/8″ UNC threaded hole in the base which we’re going to use to attach it to the short post. Mine had a 3/8″ BSF hole however. Both are “nonstandard” size nowadays in most of the world (which has gone metric outside the USA), so I recommend you buy the ball head first then make sure you buy the right bolt, just in case.
I used wing nuts and split washers to assemble the parallelogram. This is because wing nuts can be tightened without spanners which will be useful in the cold and dark.
A note on counterweights: Our binoculars weigh about 800g. If your’s are significantly different, you may need a different mass. Experiment to see what works.
Construction
Make the rails:
- Mark the centre line of one short rail and drill an 8mm diameter hole 3cm from one end.
- Use this hole as a guide to drill holes at the same place at one end of the other three rails.
- Now drill 8mm diameter holes 3cm from the other end of the short rails.
- Place one short rail on top of one long rail so that the holes at the end line up, then use the hole at the other end of the short rail to mark where to drill the long rail.
- Repeat for the other long rail.
Make the posts:
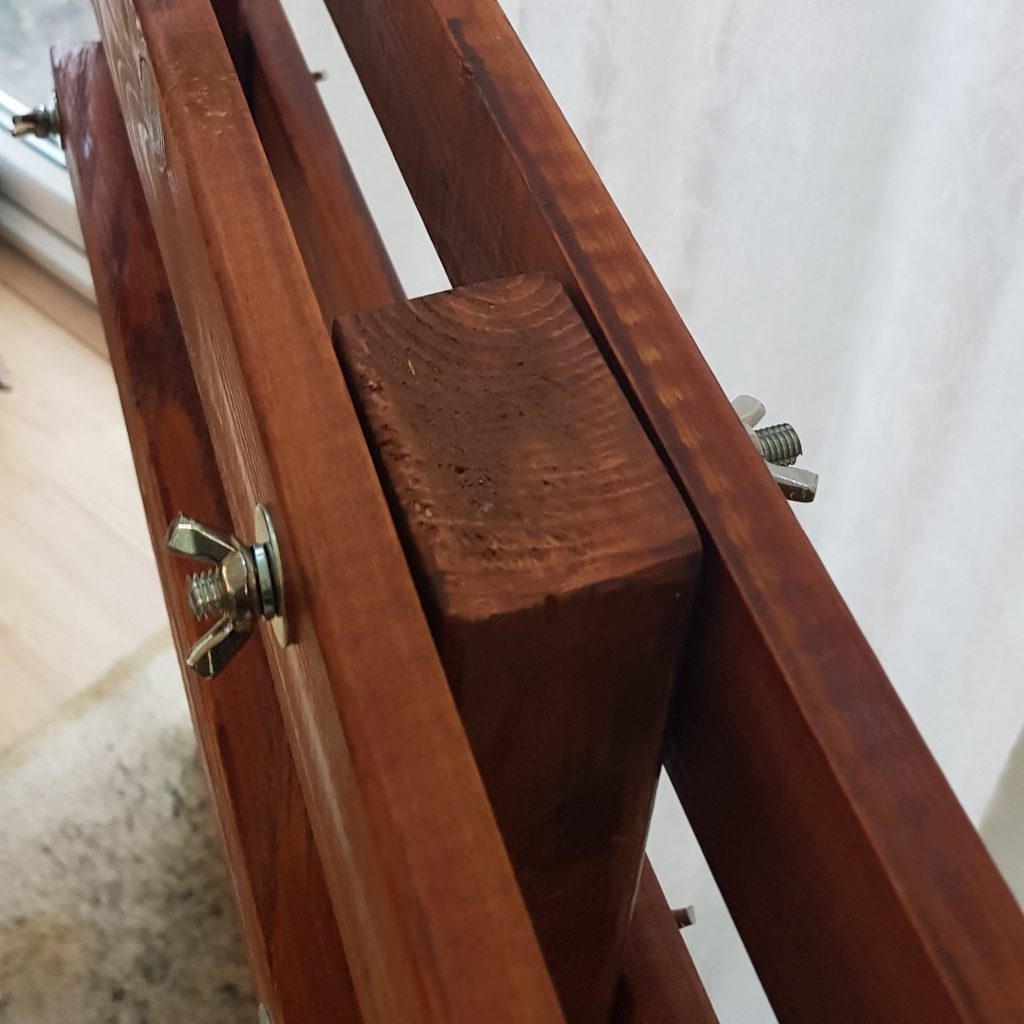
- Mark the centre line of the wider face of the short post and drill an 8mm diameter hole 3.5cm from the top and bottom.
- Place the short post on top of the long post so that one end lines up, then use the holes you just drilled to mark where to drill the long post.
- The long post should now have two holes drilled through it, one 3.5cm from the top and one about 18cm from the bottom.
Drill the centre pivot:
- Place the long post in a vice with the bottom end upwards.
- Mark the centre point of the end by drawing diagonals across it, and then drill a 10mm diameter hole downwards, parallel to the length of the post, for about 10-15cm.
- Its important that this is parallel to the sides of the post.
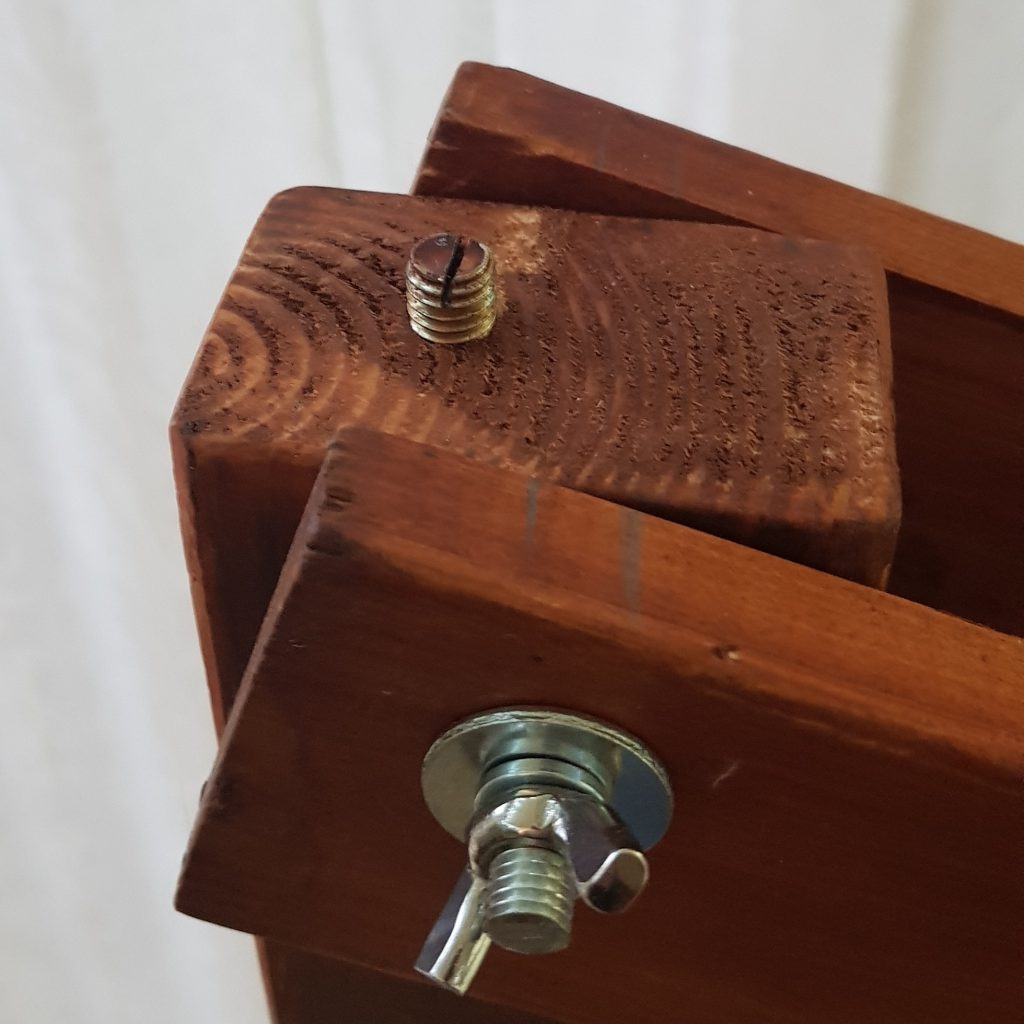
Make the ball head attachment:
- Measure how far you can screw the 3/8″ BSF bolt into the tripod ball head.
- Cut the head off the bolt.
- Place the short post in a vice with one end upwards, and drill a hole just big and deep enough for the 3/8″ bolt, leaving enough sticking out for the ball head to screw onto.
- Fix the cut end of the bolt into the hole with epoxy resin and allow it to dry thoroughly.
- This is the top of the short post. The photos below show the final result.
I actually drilled a slightly smaller hole then screwed the cut bolt into the wood. This was quite tricky and epoxy would have been simpler!
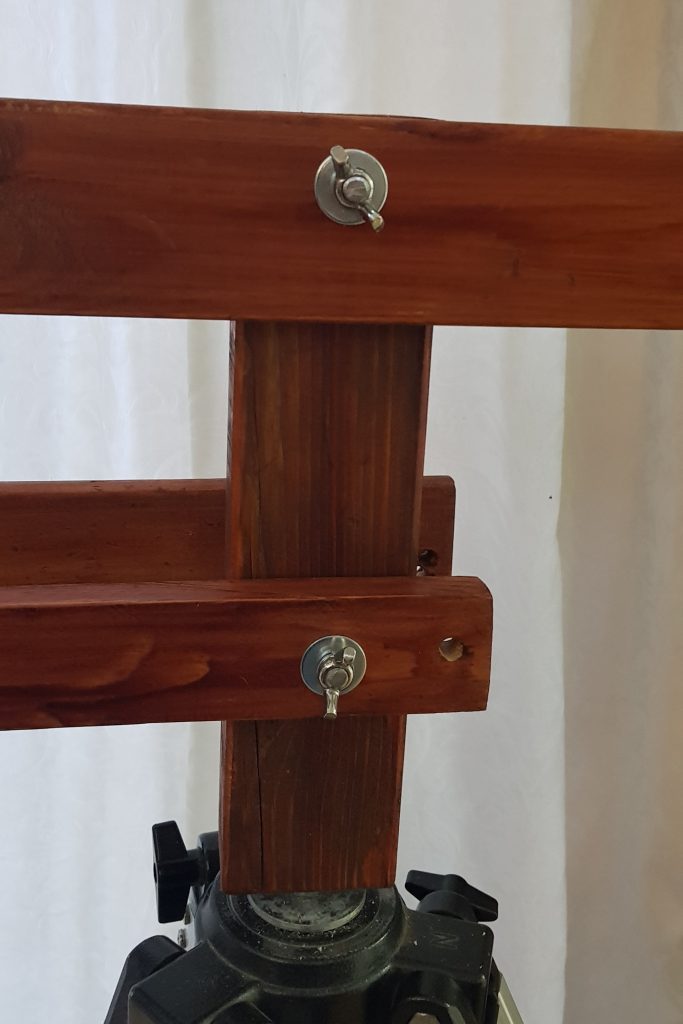
Assemble the Parallelogram:
- Slide the threaded bar through the end hole of a long rail.
- Slide a washer onto the bar and then pass the bar through the top hole in the short post so that the washer is sandwiched between rail and post.
- Slide another washer on then pass the bar through the end hole of the second long rail.
- Mark the threaded bar so that about 2cm sticks out on each side.
- Cut to length and use the file to smooth any sharp corners.
- Check the length by assembling as above, then placing a washer, split washer and wing nut on each end. You should be able to tighten the two wing nuts and have a little thread protruding.
- Cut three more pieces of bar the same length and assemble the other three joints.
- Make sure you assemble the short post with the 3/8″ BSF bolt facing up, and the long post with the pivot hole facing down!
- At each side you should have wing nut, split washer, flat washer, rail, flat washer, post.
- Tighten up the wing nuts so that the joints move but are quite stiff. You want some friction to keep the binoculars in place.
Assemble the Pivot:
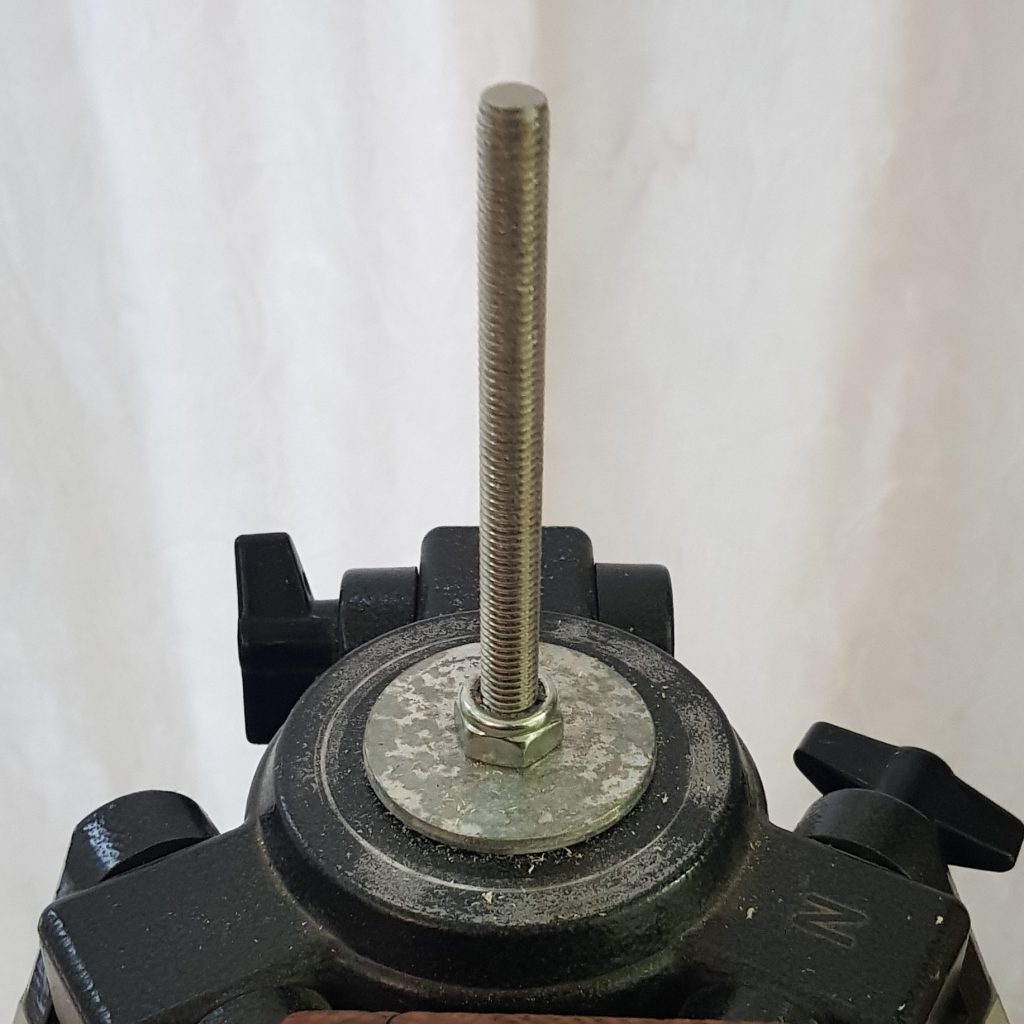
- Attach the 10mm bolt to the tripod head, pointing upwards.
- Telescope tripods usually have a 2.5cm hole through them and our bolt is only 10mm in diameter, so I found i needed to screw some extra nuts down the bolt, then place several big washers on either side, to stabilise it. You can see this in the photos below.
- Wind the locking nut down from the top to clamp the bolt firmly in place.
Final Assembly:
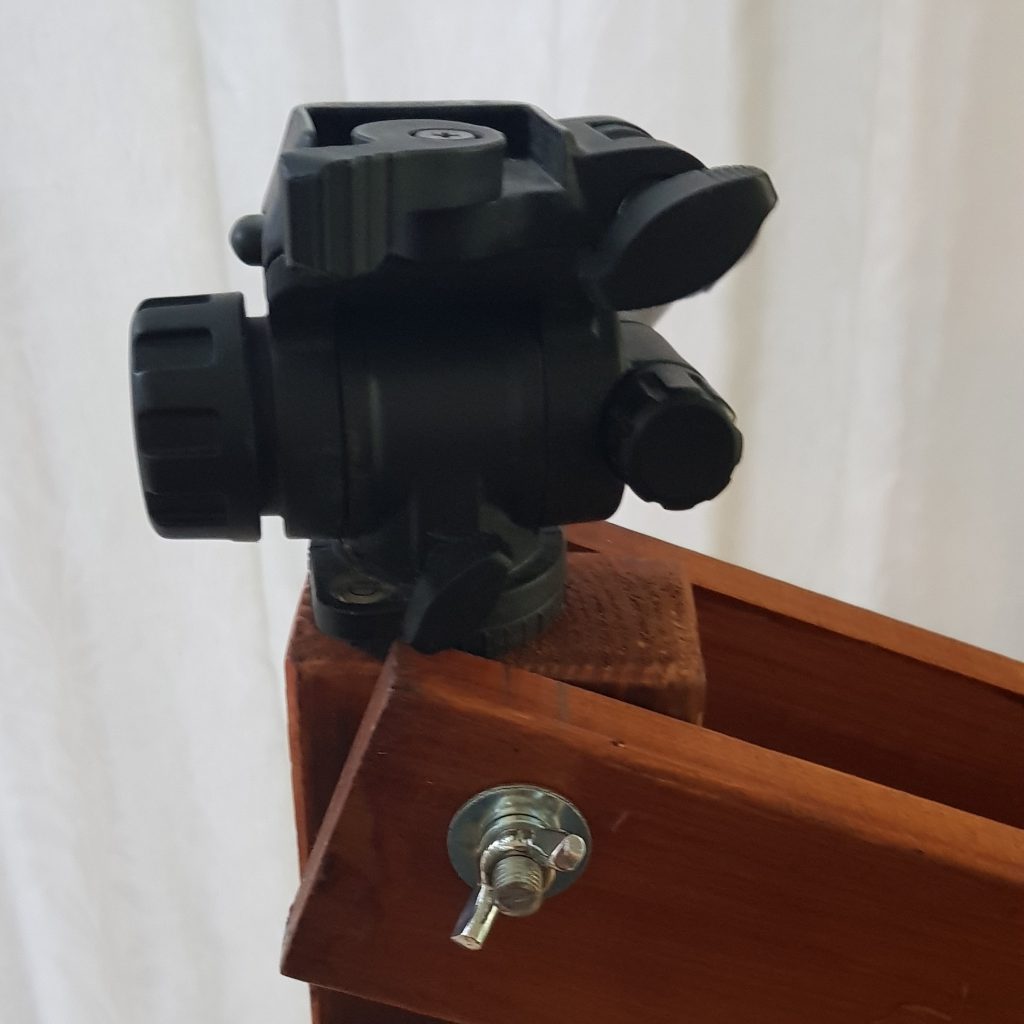
Slide the hole in the long post over the bolt to mount the parallelogram on the tripod. Finally screw the ball head to the 3/8″ BSF bolt. You may find that the top corners of the long rails catch on the ball head in certain configurations, as shown in one of the photos (below left). If this is a problem, remove the ball head again, then carefully cut off the protruding corners of the rails and sand them smooth before reattaching the ball head.
Balancing the Binoculars
There’s just one thing left to do – balance it for your binoculars. This is easier with two people.
- Attach the binoculars to the ball head using a binocular-to-camera-shoe bracket. Get your assistant to take the weight.
- Slacken off the wing nuts.
- Place the 1kg weight flat on top of the top rails near the long post.
- Slide it slowly outwards away from the post, until the weight counterbalances the binoculars.
- Mark the position of the centre line of the weight on the long rails.
- Take the binoculars back off the mount.
- Drill a 10mm hole through both long rails at the point you marked.
- Slide the 8mm bolt through one rail, then through the counterweight, then through the other rail. It will be a loose fit.
- Put a nut on the bolt to prevent the counterweight falling off when in use. There’s no need to tighten the nut, just wind it on a few turns so it can’t fall off
- Finally, tighten the wing nuts on the joints so that the mount can move, but remains in place once moved.
- If you plan to use different binoculars on the same mount, repeat this exercise to find the balance point for each pair and drill separate holes. Some designs incorporate holes every few centimetres but i think this is unnecessary as you probably won’t have a dozen pairs of binos of different weights!
I recommend you store the parallelogram mount unshipped from the tripod and without counterweight. This will prevent the pivot bolt from getting bent or the weight pulling the tripod over. Also, its quite heavy to move around!
Nice plan, please email! Chas